|
DCP_4222
Another test fit with the even narrower setup.
Date: 05/18/2008
Views: 787
|
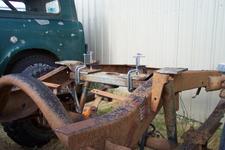
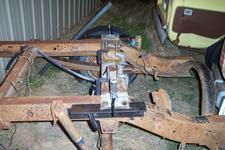
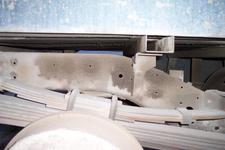
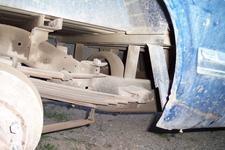
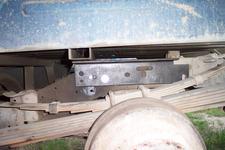
DCP_4223
Approximate location relative to the axle. The bed-mount/supports (note the "stain" where it used to be) sit against a box-tube structure under the box. No room to put the hitch plate under the box, and don't want to cut the box out.. so this
Date: 05/18/2008
Views: 827
|
DCP_4224
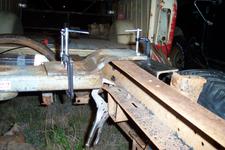
Side plates mocked in place for more test fit
Date: 05/18/2008
Views: 785
|
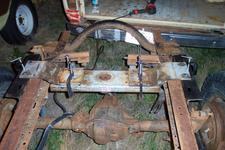
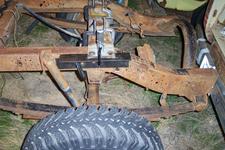
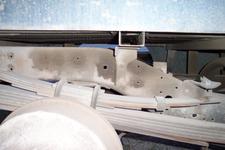
DCP_4225
The side angle plates are going to replace the box mounts. The Z-plates will push up against the box-tube bed stiffener.
Date: 05/18/2008
Views: 1023
|
DCP_4226
Date: 05/18/2008
Views: 809
|
|
DCP_4227
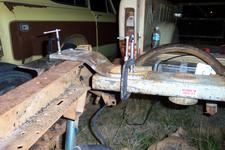
On my test mule, you can see the 1974/75 staggered rear shocks. It limits how far forward the side plates can be AND how far back. I trimmed a little off the passenger side (bottom in pic) plate to slide the assembly rearward a touch (it was hitting the
Date: 05/18/2008
Views: 1134
|
DCP_4228
Date: 05/18/2008
Views: 1062
|
DCP_4229
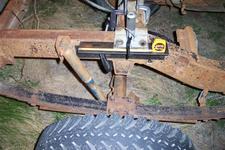
This shot is to give a reference to where the ball will be relative to the axle.
7.75 at the center of the bump stop, 9.5 to the center of the hitch? At least 2" forward of the axle. On the Travelette, I think it'll work out to nearly 4".
Date: 05/18/2008
Views: 1266
|
DCP_4230
I think this is it..
Date: 05/18/2008
Views: 771
|
DCP_4231
Redrilling two of the holes in one side. What used to be the two inner holes now overlap the two outer holes - might make a perfect oval. Unfortunately, there isn't enough slot in the Z-plates outer mounting points to narrow up the hole assembly nearly
Date: 05/18/2008
Views: 736
|
|
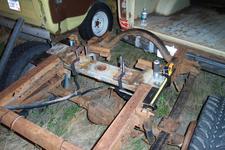
DCP_4232
Box mount in the Travelette
Date: 05/19/2008
Views: 753
|
DCP_4233
Box mount in the Travelette
Date: 05/19/2008
Views: 735
|
DCP_4234
Date: 05/19/2008
Views: 747
|
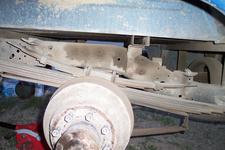
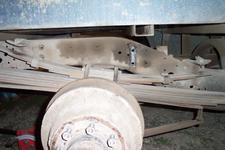
DCP_4235
Rear of the rear suspension - you can also see C-channel on the frame rails and under the box, from the PO's 5th wheel install.
Date: 05/19/2008
Views: 753
|
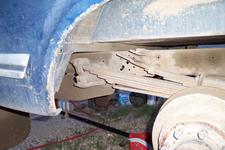
DCP_4236
Front of the rear suspension - also note the vertical stand-offs welded to the frame, and C-channel under the box, again, part of a previous owner's 5th wheel install
Date: 05/19/2008
Views: 739
|
|
DCP_4237
Box mount removed
Date: 05/19/2008
Views: 744
|
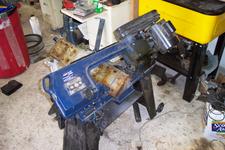
DCP_4238
Narrowing up the hitch box in the bandsaw.
Date: 05/21/2008
Views: 739
|
DCP_4239
Narrowing up the hitch box in the bandsaw.
Date: 05/21/2008
Views: 726
|
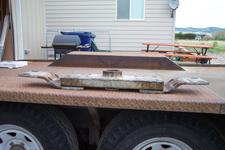
DCP_4240
Narrowing up the hitch box in the bandsaw.
Date: 05/21/2008
Views: 773
|
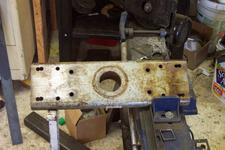
DCP_4241
Narrowed hitch box
Date: 05/21/2008
Views: 778
|
|
DCP_4242
4" hole cut in the bed.
Date: 05/21/2008
Views: 766
|
DCP_4243
4" hole cut in the bed.
Date: 05/21/2008
Views: 781
|
DCP_4244
Driver's gooseneck mounting "L" plate held in place.
Date: 05/21/2008
Views: 722
|
DCP_4245
You can see how it is replacing the box mount.
Date: 05/21/2008
Views: 1133
|
DCP_4246
Narrowed hitch box and Z-plates, test fit.
Date: 05/21/2008
Views: 739
|