- Log in to post comments
A few years back, a friend asked if I wanted a derelict riding lawn mower. His parents had blown a hole in the side of the block, and it needed to go away.
I had just finished reading a few fun articles about building a "go-kart" from one, along with an interest in electric cars.. so sure, drop it off.
It sat for a while.
I've finally tackled the project with good results.
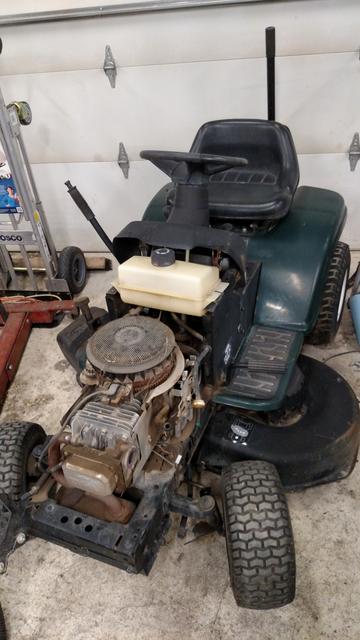
Can you see the problem?
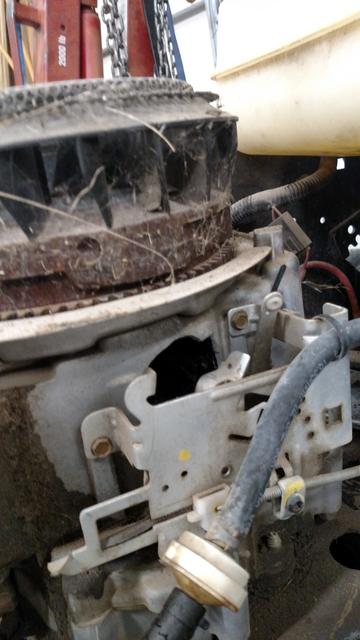
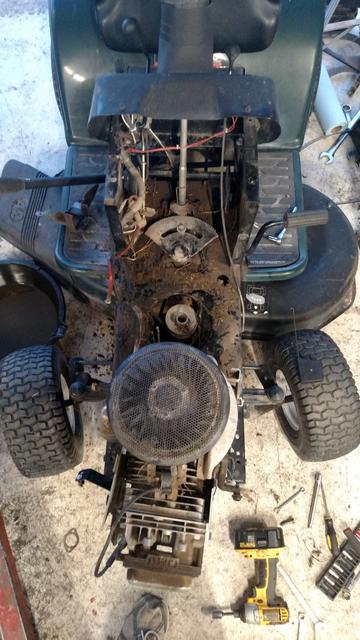
First order of business was to pull the dead gas engine and accesories.
Then I bought an ME1004 electric motor. It will draw up to 400amps at peak, but running draw is 100-200amps at 48V.
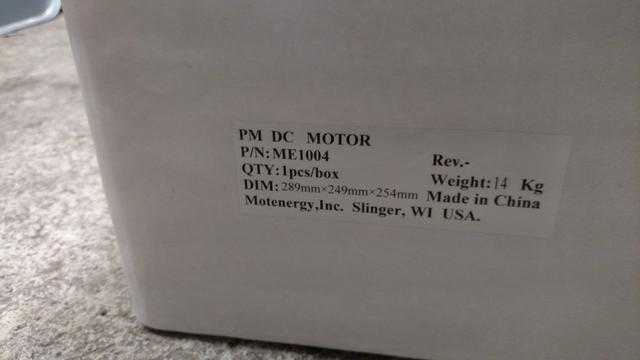
It has a 1" diameter shaft that is the same as the dead gas engine.
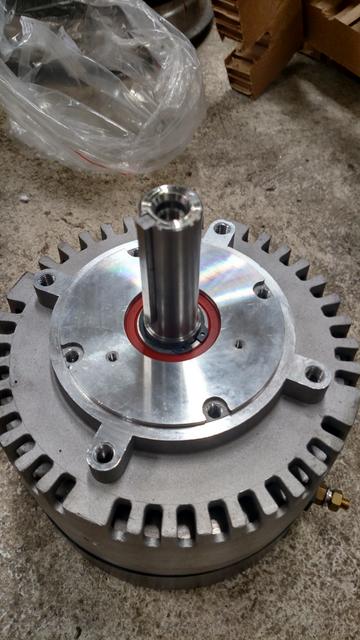
So the pulley goes right on.
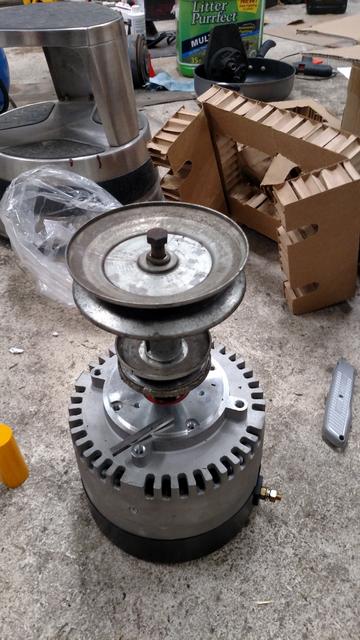
Jumping ahead a moment - I did have to shim the pulley down, because the gas engine shaft is longer than the electric.
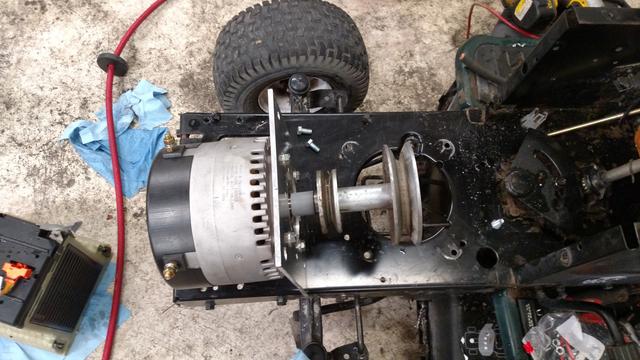
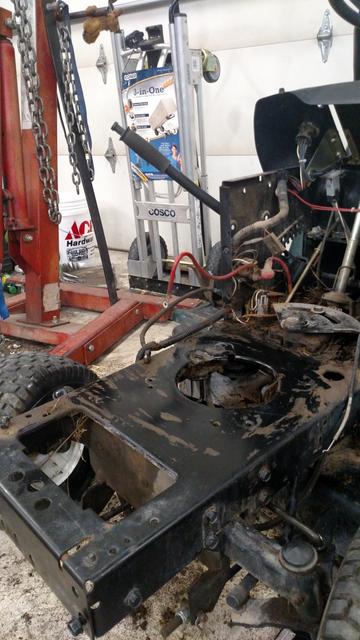
Not much on the mower frame after you pull the gas motor and muffler and such.
Then a quick mock up of the electric.
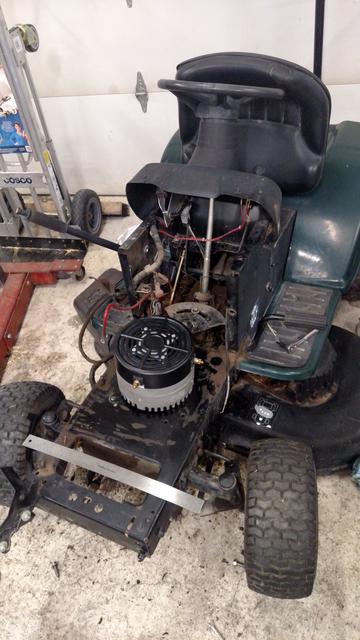
I needed to adapt the gas engine bolt pattern to the electric motor, so I picked up a chunk of 1/4" aluminum plate.
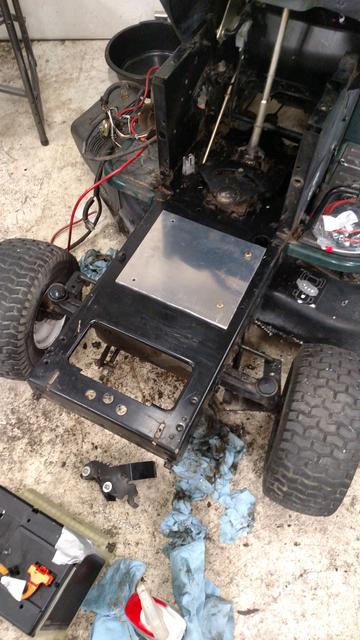
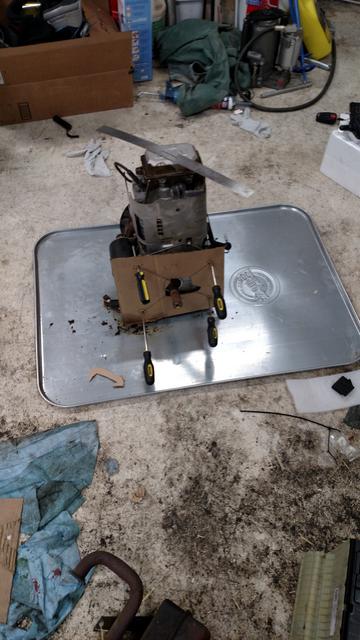
Cardboard was used to try to transfer the bolt pattern from the gas engine.
Then a hole saw
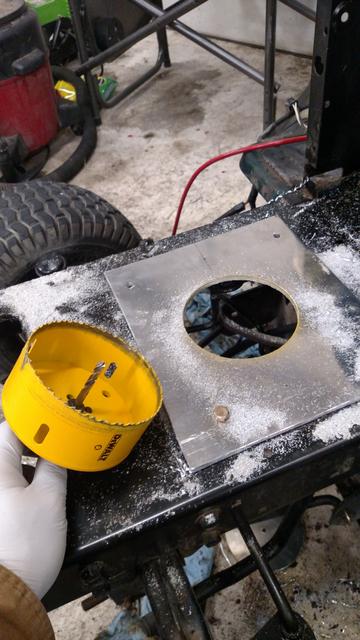
and a nice fit to the electric.
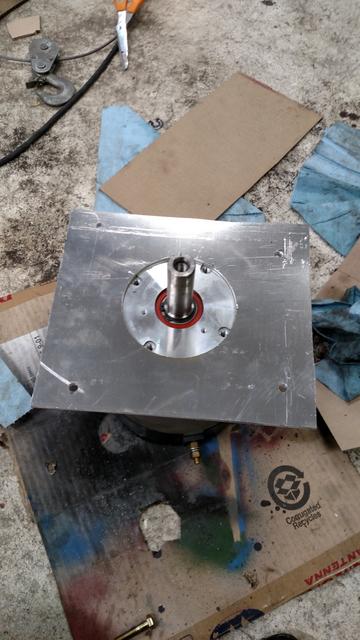
and more hole identification.
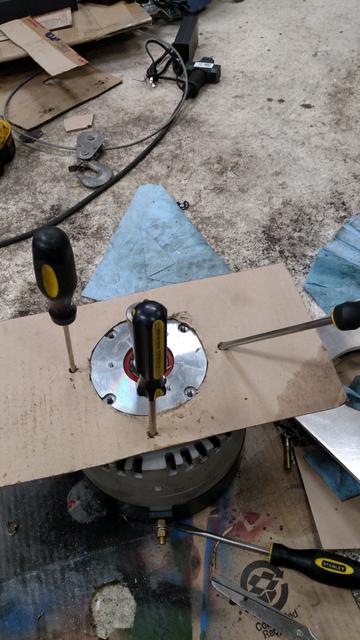
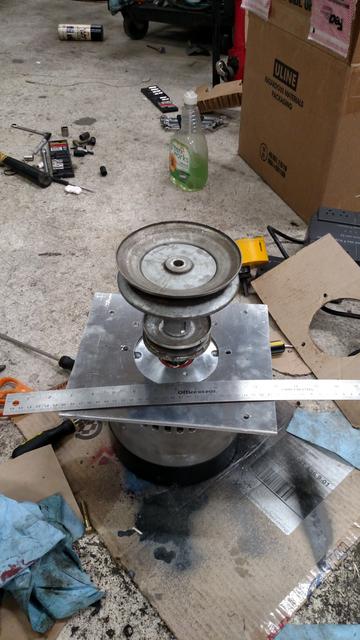
A test fit
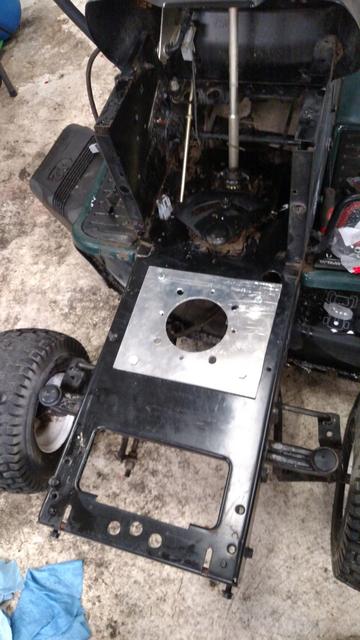
Naturally, I found some of my holes off, and then that some of them were too close to the edge of the existing hole in the frame. I didn't want to relieve the frame - there's a nice rolled stiffening lip there - and ultimately I didn't have to.
I just used some 3/8 reduced head "header" bolts to let me fit a little snugger.
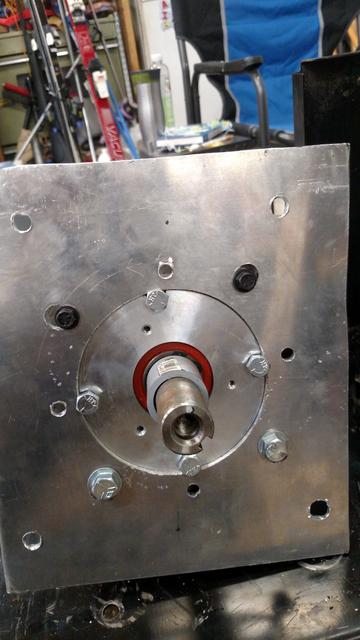
Which brings me back to the earlier picture.

An electric lawn mower needs power.
My original plan was some "take-out" 80-ah 12v UPS batteries, but I dawdled and couldn't get my hands on them when I needed 4 of them.
I looked around at new batteries, and my various options.
Eventually, I settled on a used Chevy Volt battery from Hybrid Auto Center. 48v, 47amp-hour or 2kwh. Relatively light, and compared to the 4 12v lead batteries I wanted, a lot smaller.
I can put it in a few orientations, in a few spots.
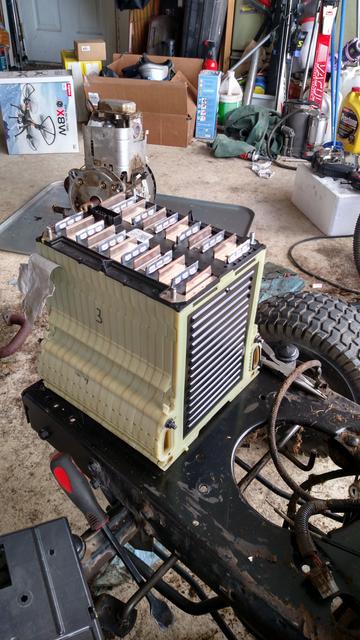
For this pack, I decided to put it up front, over the muffler hole. I used some rod across the battery, and some 1x1 square steel to make 90-deg elbows.
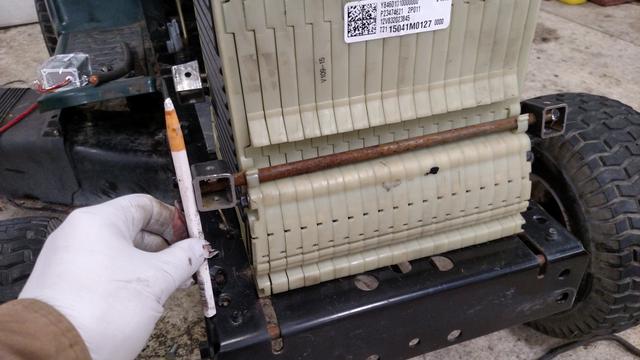
Some 1/4" all-thread finished the job.
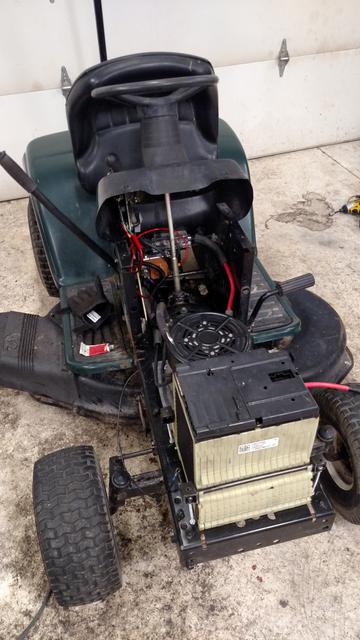
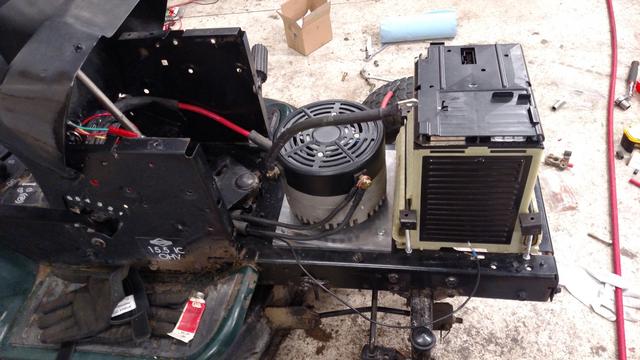
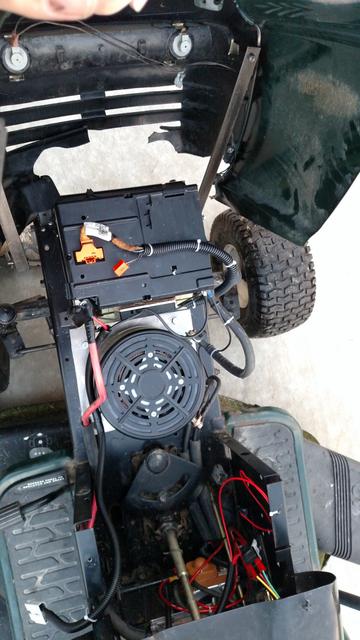
I have enough room to put a second pack between the firewall and motor, and even a third under the seat and above the transaxle.
I put the first battery nose-forward to keep the wiring area clearer under the dash - but now that I have it all "sorted" I could drop a second battery pack down over the steering shaft and be fine.
So what else did I need?
Look under the dash, and you might see a 48V relay behind the steering shaft.
There is also a 400amp fuse near it.
The negative lead of the battery goes to the motor, and is 2/0 battery cable. This was just a remnant I had lying around and couldn't figure out why I had saved it... :D
The positive lead is 2gauge made from a used battery cable. From the fuse to the relay, and relay to the motor is 4-gauge wire, but doubled up - again, made from used car battery cables I had saved.
One more item I needed - for a Lithium ion battery, we should use a battery management system. I got one from HybridAutoCenter as well, along with a 48V (50V) charger.
I had to do some soldering, but they had shipped me the GM BMS pigtail so that made things pretty easy.
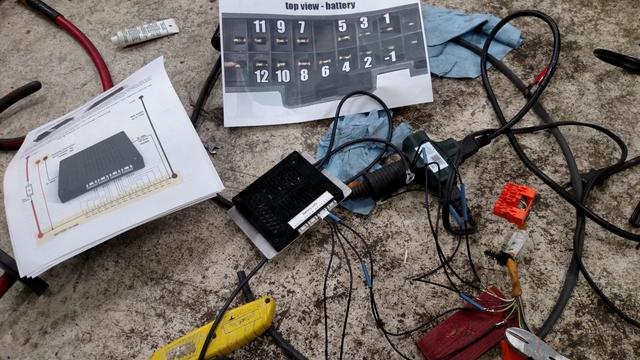
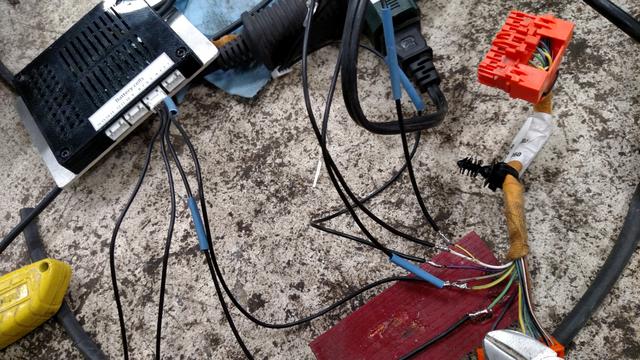
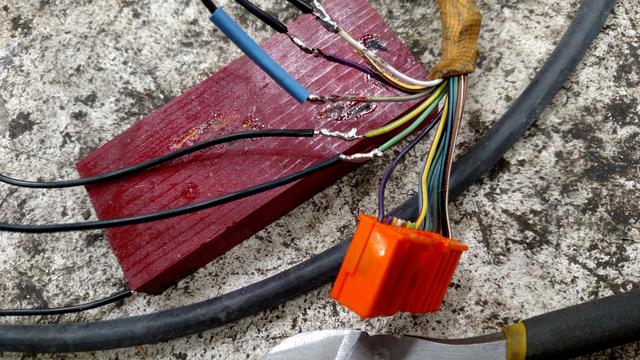
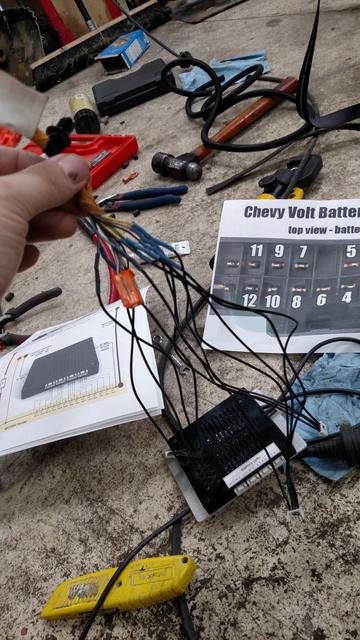
I mounted the BMS to the rear of the battery with large zip-ties.
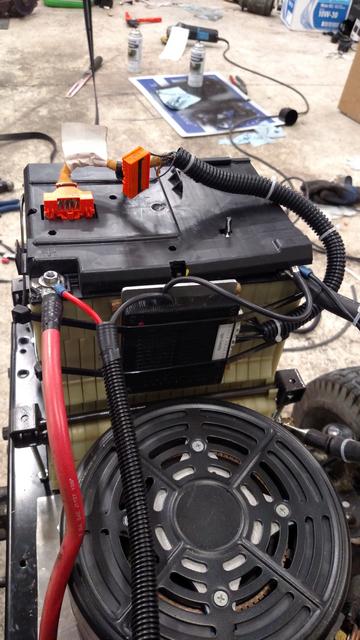
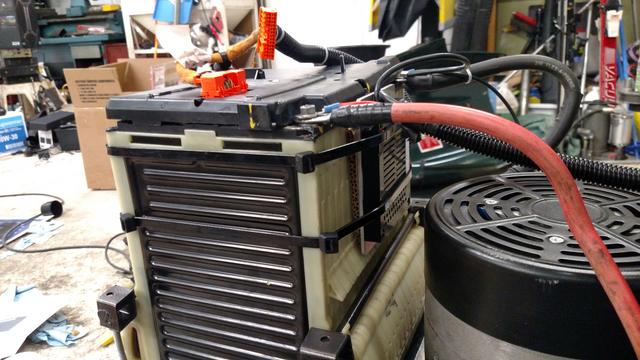
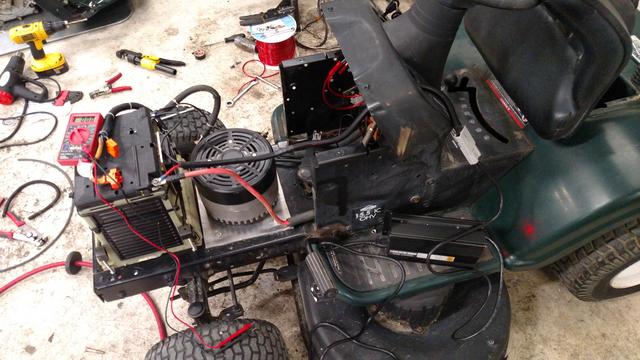
You might also see where I put some 3/4 or 7/8 heater hose over the battery cables at various rub points to add bulk, provide some protection.
I changed out the key switch for a 48V model - that just involved tack welding a piece of metal to the backside of the dash to redrill for the different switch.
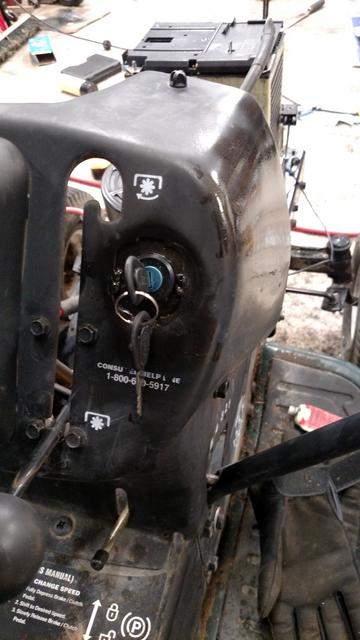
I need to do better on it, but I even built hinges to hold the stock hood back on.


Not documented - I bought a 48V switch and installed it under the rear seat where the gas motor had a safety switch.
So the circuit path is "battery + to key switch, key switch to seat switch, to main 48v relay" - so the under-seat is "cold" unless the key switch is on, and if you flip the seat forward (or you're not sitting on the seat) the motor will not run.
I also added a 48V ->12V down converter to run the headlights for a finishing touch. Bonus, I put power-poles on it so I can run my amateur radios from the 2kwh battery pack should I desire.
Operation is pretty normal - turn the key, hear the motor whir, put it in gear, release the clutch, away you go.
When you mow, you just engage the mower deck like normal.
It is pretty quiet driving, but still noisy mowing - moving those blades moves a lot of air and makes a lot of noise.
Run time is around 20 minutes if you have the mower deck engaged.
That is long enough to do my front or my back yard, but might not be enough to do both.
The charger takes a few hours to replenish the battery, then shuts off. It charges to 50V, and I discharge no lower than 42V.
It would probably run a long ways if I just drove it around like a go-kart.
I did take a little video of the mower in action.
Youtube
and one of the audio sounds
Audio
I had just finished reading a few fun articles about building a "go-kart" from one, along with an interest in electric cars.. so sure, drop it off.
It sat for a while.
I've finally tackled the project with good results.

Can you see the problem?

First order of business was to pull the dead gas engine and accesories.

Then I bought an ME1004 electric motor. It will draw up to 400amps at peak, but running draw is 100-200amps at 48V.

It has a 1" diameter shaft that is the same as the dead gas engine.

So the pulley goes right on.

Jumping ahead a moment - I did have to shim the pulley down, because the gas engine shaft is longer than the electric.

Not much on the mower frame after you pull the gas motor and muffler and such.

Then a quick mock up of the electric.

I needed to adapt the gas engine bolt pattern to the electric motor, so I picked up a chunk of 1/4" aluminum plate.

Cardboard was used to try to transfer the bolt pattern from the gas engine.

Then a hole saw

and a nice fit to the electric.

and more hole identification.


A test fit

Naturally, I found some of my holes off, and then that some of them were too close to the edge of the existing hole in the frame. I didn't want to relieve the frame - there's a nice rolled stiffening lip there - and ultimately I didn't have to.
I just used some 3/8 reduced head "header" bolts to let me fit a little snugger.

Which brings me back to the earlier picture.

An electric lawn mower needs power.
My original plan was some "take-out" 80-ah 12v UPS batteries, but I dawdled and couldn't get my hands on them when I needed 4 of them.
I looked around at new batteries, and my various options.
Eventually, I settled on a used Chevy Volt battery from Hybrid Auto Center. 48v, 47amp-hour or 2kwh. Relatively light, and compared to the 4 12v lead batteries I wanted, a lot smaller.
I can put it in a few orientations, in a few spots.

For this pack, I decided to put it up front, over the muffler hole. I used some rod across the battery, and some 1x1 square steel to make 90-deg elbows.

Some 1/4" all-thread finished the job.


I have enough room to put a second pack between the firewall and motor, and even a third under the seat and above the transaxle.
I put the first battery nose-forward to keep the wiring area clearer under the dash - but now that I have it all "sorted" I could drop a second battery pack down over the steering shaft and be fine.
So what else did I need?
Look under the dash, and you might see a 48V relay behind the steering shaft.
There is also a 400amp fuse near it.
The negative lead of the battery goes to the motor, and is 2/0 battery cable. This was just a remnant I had lying around and couldn't figure out why I had saved it... :D
The positive lead is 2gauge made from a used battery cable. From the fuse to the relay, and relay to the motor is 4-gauge wire, but doubled up - again, made from used car battery cables I had saved.
One more item I needed - for a Lithium ion battery, we should use a battery management system. I got one from HybridAutoCenter as well, along with a 48V (50V) charger.
I had to do some soldering, but they had shipped me the GM BMS pigtail so that made things pretty easy.


I mounted the BMS to the rear of the battery with large zip-ties.


You might also see where I put some 3/4 or 7/8 heater hose over the battery cables at various rub points to add bulk, provide some protection.
I changed out the key switch for a 48V model - that just involved tack welding a piece of metal to the backside of the dash to redrill for the different switch.

I need to do better on it, but I even built hinges to hold the stock hood back on.


Not documented - I bought a 48V switch and installed it under the rear seat where the gas motor had a safety switch.
So the circuit path is "battery + to key switch, key switch to seat switch, to main 48v relay" - so the under-seat is "cold" unless the key switch is on, and if you flip the seat forward (or you're not sitting on the seat) the motor will not run.
I also added a 48V ->12V down converter to run the headlights for a finishing touch. Bonus, I put power-poles on it so I can run my amateur radios from the 2kwh battery pack should I desire.
Operation is pretty normal - turn the key, hear the motor whir, put it in gear, release the clutch, away you go.
When you mow, you just engage the mower deck like normal.
It is pretty quiet driving, but still noisy mowing - moving those blades moves a lot of air and makes a lot of noise.
Run time is around 20 minutes if you have the mower deck engaged.
That is long enough to do my front or my back yard, but might not be enough to do both.
The charger takes a few hours to replenish the battery, then shuts off. It charges to 50V, and I discharge no lower than 42V.
It would probably run a long ways if I just drove it around like a go-kart.
I did take a little video of the mower in action.
Youtube
and one of the audio sounds
Audio